Tuesday, April 29, 2014

Finished Triangle Quilt

Hooray! It's finished!

Here are some work in progress pictures that I didn't have a chance to post:

Quilting:


Trimming


Finished Quilt! Sorry, no artsy pictures today because my husband isn't here to hold it up for me and it's raining outside.


I quilted it with a meandering curly cue and found this taupe-grey with metallic dots fabric at Joann to use at the backing that matches perfectly to the fabrics in the quilt! I also used it for the binding.


This was my ALYoF goal for April and I am so excited to be 4 for 4 this year! Now to think of what I need to finish in May!


Linking up with The Sassy Quilter, ALYOF, Fabric Tuesday, and Linky Tuesday!

Friday, April 25, 2014

Finished Ocean Waves Mini Quilt

I think that this quilt had been a WIP for almost 8 (yes, 8!) years. It was high time that it got finished!


This quilt is (sort of) from the book Say It With Quilts and was intended to be a bed sized quilt. But alas, there was an error in the pattern and all my triangles were cut half the size that they were supposed to be! So after a lot of trial and error and seam ripping, this mini quilt was born.


I randomly pieced all of the triangle units together, and there are something like 20 different colors of fabric -- and this was done far, far before the age of pre-cuts!


My mom was lovely enough to machine quilt some simple loops and swirls in black thread on it for me and to machine bind it to perfection! I'm planning to use it as a table topper on our patio.


Quilt Stats:
Pattern: Ocean Waves, based on pattern in Say It With Quilts
Fabrics: mishmash of solids from the almighty scrap bin
Quilting: loops and swirls in black by Lori K.
Size: 27 inches square.

Linking up with Finish It Up Friday! Don't forget to enter the traveling stash giveaway and if you haven't had a chance yet to join in our new QAL, we are only four blocks in and it's easy to catch up!

Thursday, April 24, 2014

Traveling Stash Box Giveaway!!!

I've been entering all of the contests for the traveling stash boxes that have been traveling around the quilting blog world since I started blogging and I finally got my hands on one! Woohoo!

I got the box from Jeanne at Pinehurst Projects! Here is all of what was in the box when I opened it:


There are a whole lot of novelty prints in there! Here's what I took:


Here's all that I added:


Yes, that is a copy of Seams To Me by Anna Maria Horner! I'm trying to clear out before we move and it needs a new home!

Here are the rules:

1. You must be an active blogger to receive the box.

2. Anything within the box is free for the taking. Just replace everything that you take with something of comparable quality.

3. Post about receiving the box, host the giveaway to pass on the box to another blogger, and send the box in a timely manner!

4. The box is heavy, so this will open to US bloggers only.

Since this box was split into two boxes by Samantha at Sami's Crafts two years ago, it has visited 32 different bloggers! I am planning to transfer it from its current box to a Flat Rate box so it will be easy peasy to keep passing around.

To enter, just comment with your blog address to confirm that you are an active blogger! I will close the contest next Wednesday and announce the winner next Thursday.

Wednesday, April 23, 2014

Scrap Happy.

While I was in Michigan this past weekend for Easter, I did my usual raid of the scrap bins at home. I picked a few things with some new projects in mind.

All of these scraps are left over from a project where cutting directions were wrong in the pattern so all of the triangles were half the size that they were supposed to be. Part of the triangles got made into a project (that I'll be showing off later this week!) but I still have a lot of triangles. I'm planning to make them into shelf scarves for my baker's rack.


I also brought one of my mom's books and some fabrics to some blue and grey batiks that I've been collecting and found a great pattern for them.


I made all of the four patches called for in the pattern and then started working on the triangle units.


I made myself a pattern for the triangles to paper piece them, of course. I'm going to have to add in some additional cream or grey background fabric to have enough to make the whole quilt.

Linking up with Freshly Pieced at WIP Wednesday!!

Tuesday, April 22, 2014

Hip To Be Square Kits Now Available!

We are excited to announce that the Honey, Bunny, and Doll Etsy shop has expanded our fabric shop!

We are starting small, but we hope to expand a lot over this year!

We now have four colors of 108" wide backing fabric as well as black and white Kona cotton! Here are the current colors we have for 108" wide fabric -- at only $13 or $14 a yard, depending on what color you choose!

We are also now offering kits for our Hip To Be Square pattern in the colorway shown in the original quilt including binding!


Don't hesitate to contact us with any questions or requests! We want to offer what our readers are interested in buying!

Monday, April 21, 2014

QCQAL Block #4: Jacob's Ladder

Another Monday, another QCQAL block to share with you! Block #4 is Jacob's Ladder.


This block is a great one on its own in quilts -- check out all this quilty inspiration on Pinterest! This is a great option for scrappy quilts!

On to the good stuff:

Cutting:
Two 5 inch squares background fabric for HSTs
Two 5 inch squares for HSTs
Two strips 2.5 inches by 25 inches (minimum) -- each one a different color for four patch units


Sew your strips for your four patch units together. Press to one side and subcut into 10 2.5 inch segments.


Quick note on cutting your strips:
You'll be subcutting the strips into ten - 2.5" segments so if your fabric is shorter than 25 inches, you'll have to cut more than one strip. I cut one long strip from a fat eighth that was ~22 inches long and then cut two more 2.5 inch squares of each color. In total, you'll need enough length to cut 10 2.5 inch squares of each of your two colors.

Sew your 10 units into 5 four patch units.


Lay out your pieces as shown below. You should have one color along one diagonal and one color along the other diagonal created by the four patches.


Here's my finished block:


Here are all four of my finished blocks:


Don't forget to share your blocks in the Flickr group!

Tuesday, April 15, 2014

Tuesday Triangles

Hooray! I've completed the top of my triangle quilt!

Here's some of my rows all together:


It was a lot easier for me to sew them together in rows diagonally rather than rows across to keep track of which way to iron my triangles and to keep them in the right order!

Here's the whole quilt sewn together and the sides trimmed:


It needs a good press before it gets layered to quilt, but before that I need to get a batting and a backing together! Thinking that I might do a pieced backing for this one, but not entirely sure yet! Need to stare at my (now-organized!) stash and see what matches well.

I've already decided that I want to bind it in either solid black or solid dark grey with the entirety of the quilt in prints. But I am SO happy with how it has turned out and that I get to knock one more quilt style off my "to-do" list.

Linking up with The Sassy Quilter's Triangle QAL, Fabric Tuesday, Linky Tuesday, and WIP Wednesday.

Friday, April 11, 2014

Scrappy String X Block Tutorial

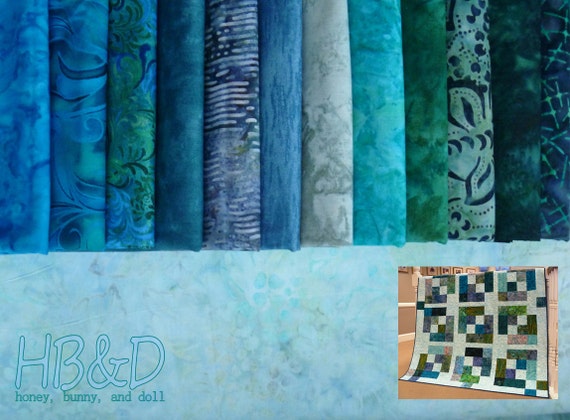
If you've been around Little Bunny Quilts for a long time, you might remember one of the first quilts I blogged about -- my scrappy X quilt. I've finally put together an easy tutorial and patterns for this quilt using foundation piecing.

First, go to Craftsy and download the free pattern for the Scrappy String X Block and print the foundation pattern -- you'll need two foundation patterns for each block you make.

(Note 1/1/19: Craftsy is no longer hosting this free pattern. This post will be updated with a link to the free template as soon as we are able to find a new site to host our free patterns.)

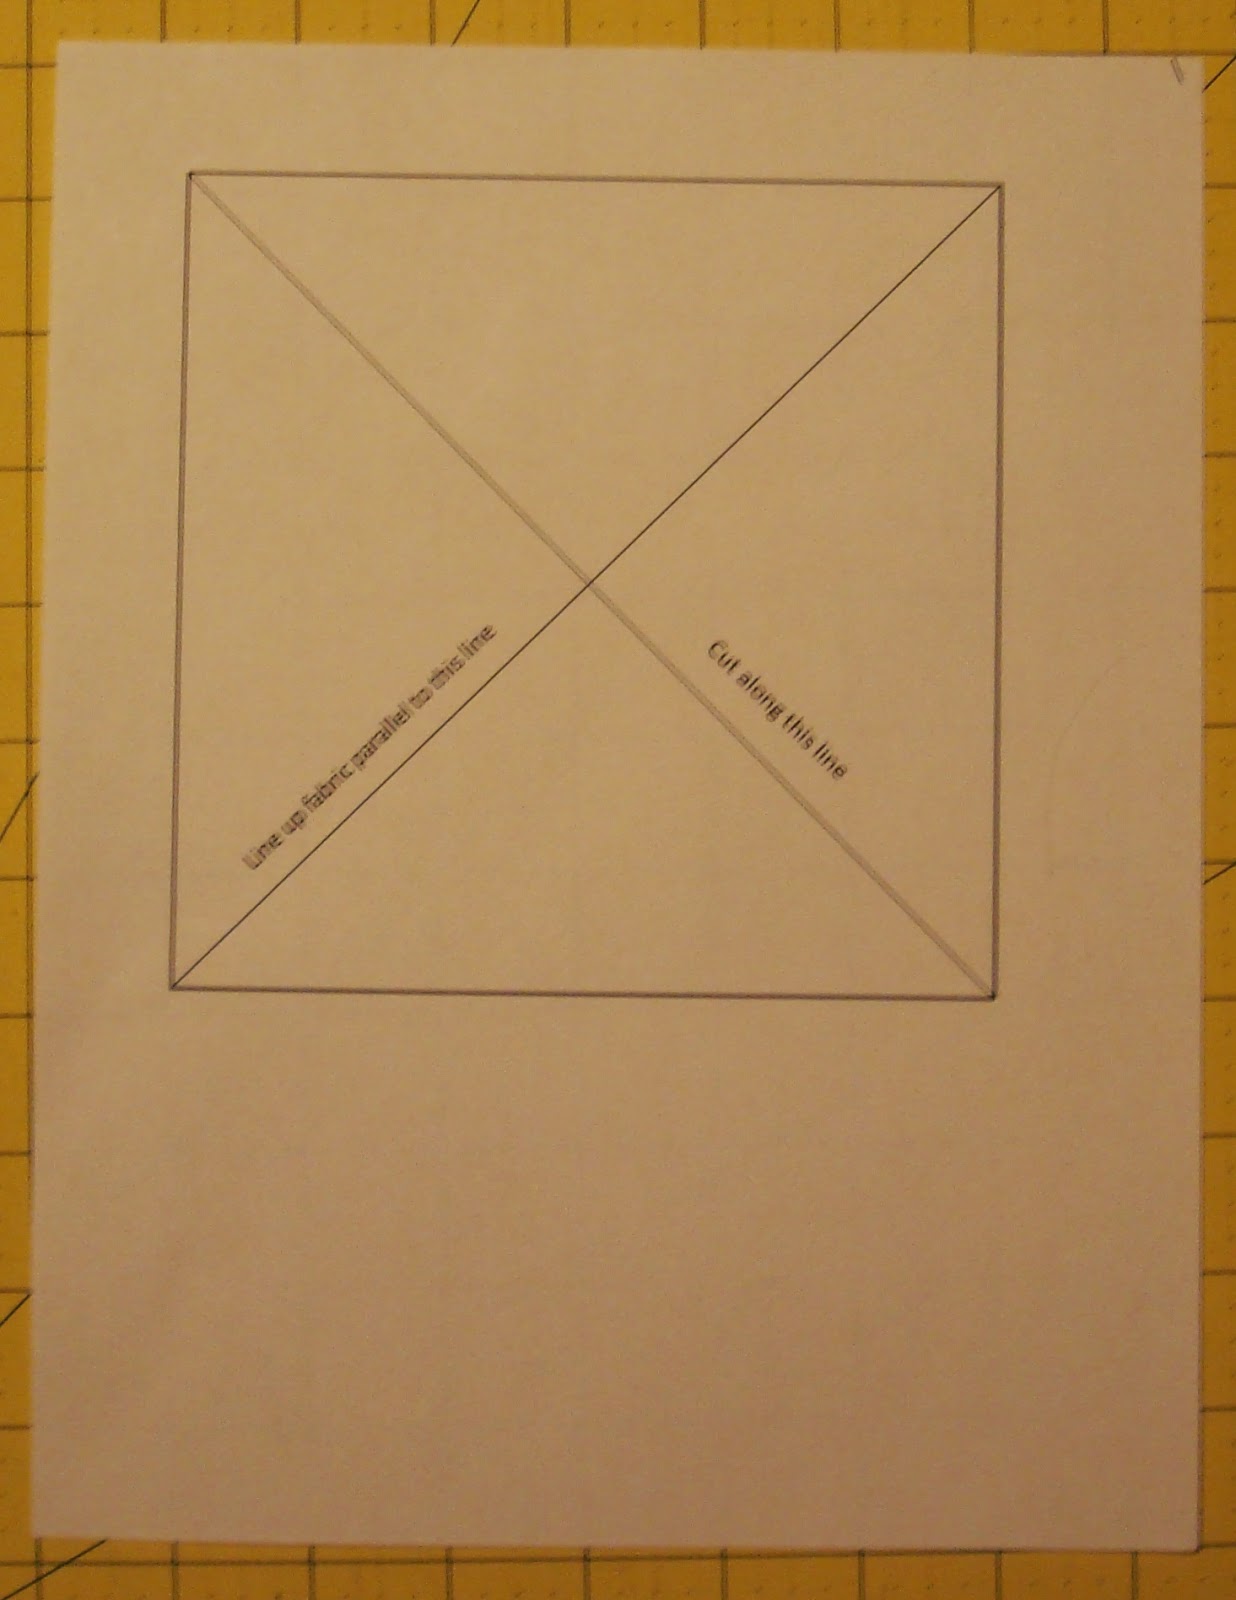
Here's a picture of what the foundation pattern looks like printed out. If you want, you can trim down the paper to approximately 1/2 inch away from the solid line of the square.


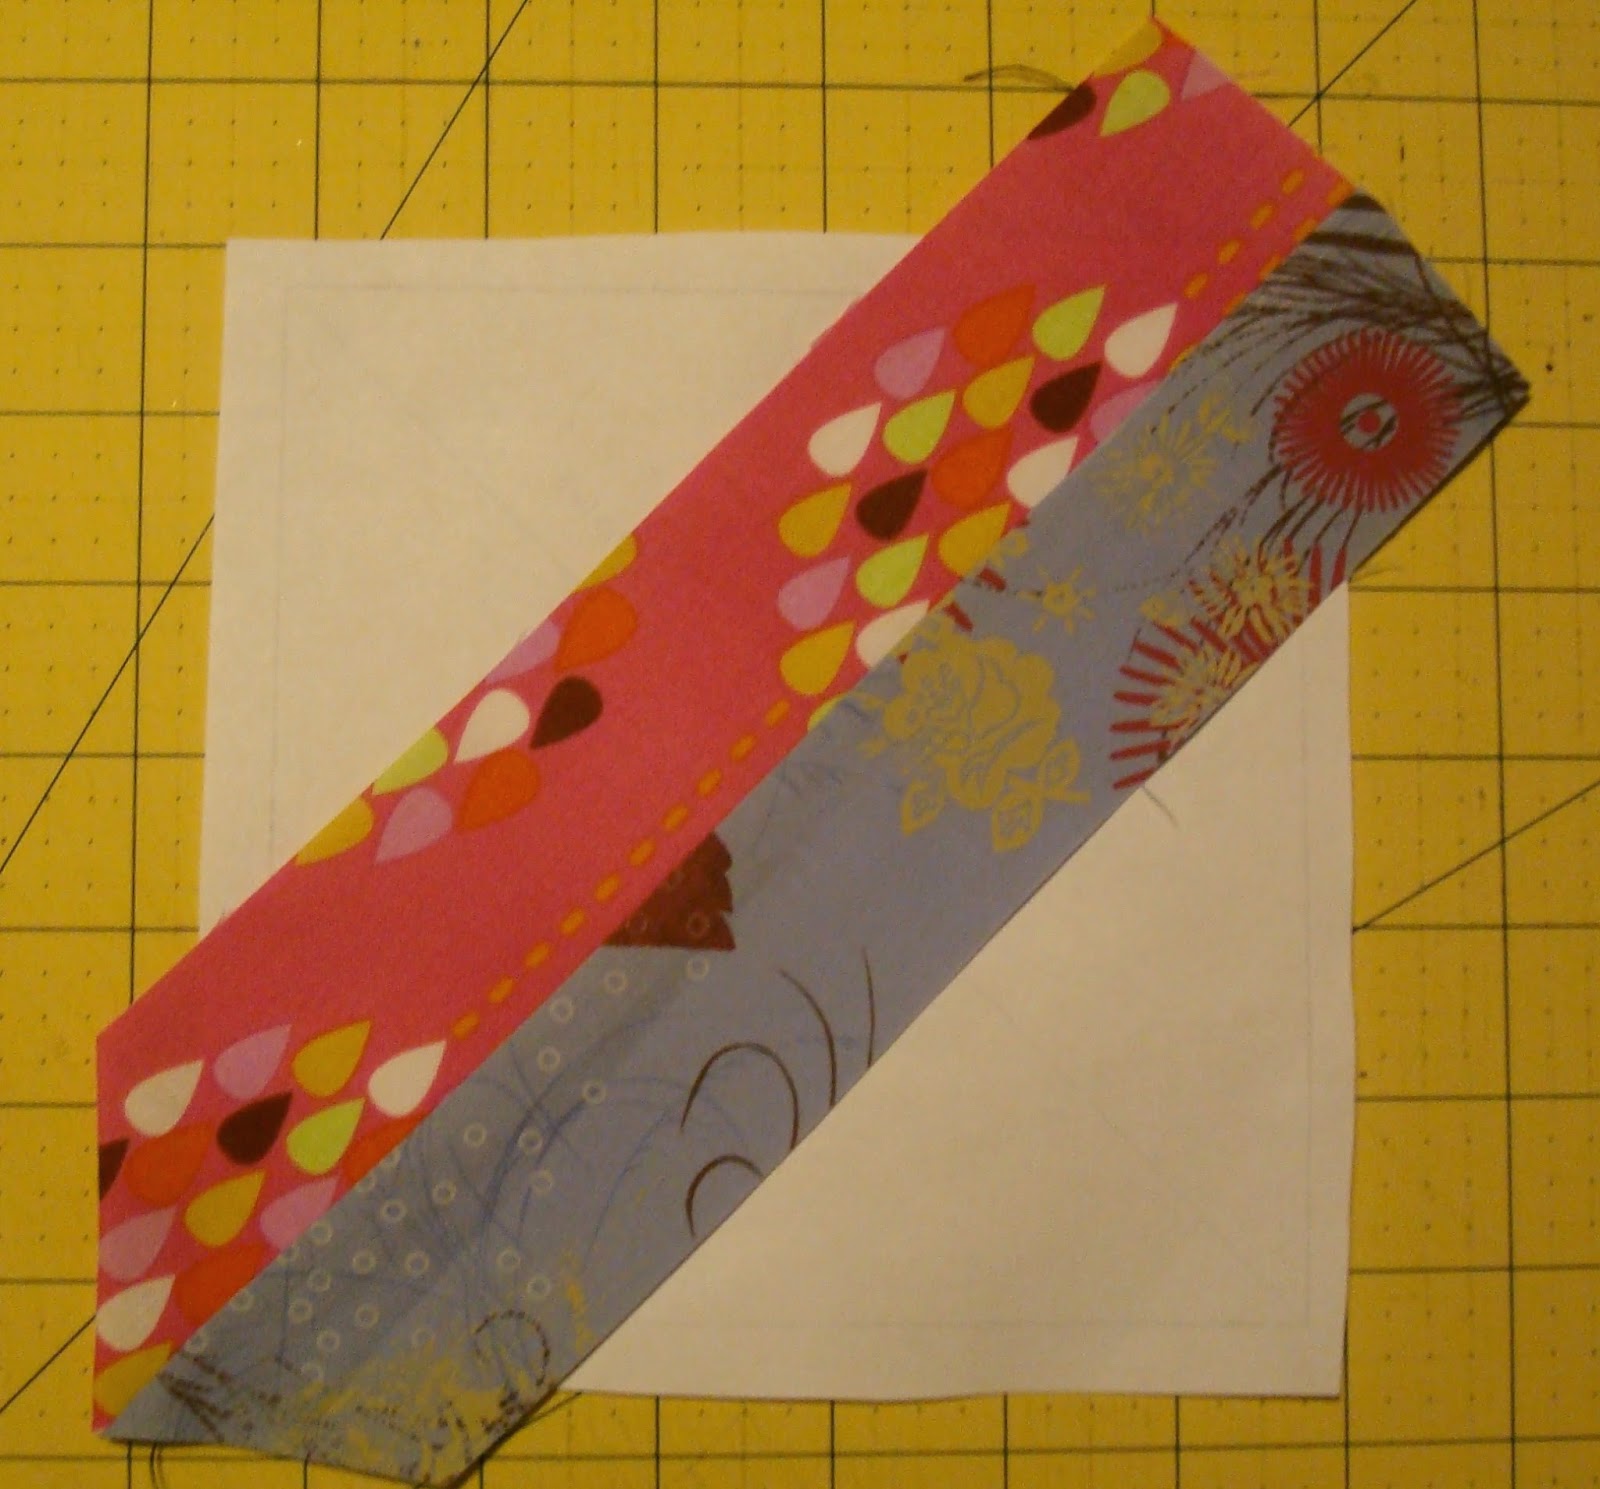
Using scraps long enough to span the entire square, pair two scraps right sides together and line up parallel to the line marked "line up fabric parallel to this line." Layer fabrics on the wrong side of the paper pattern so that you can see the square on the opposite side.


Sew 1/4 inch away from the edge of the fabric, sewing through both layers of fabric AND your paper foundation. A 1/4 inch foot is helpful here.


Press fabric to one side. Trim off excess if desired.


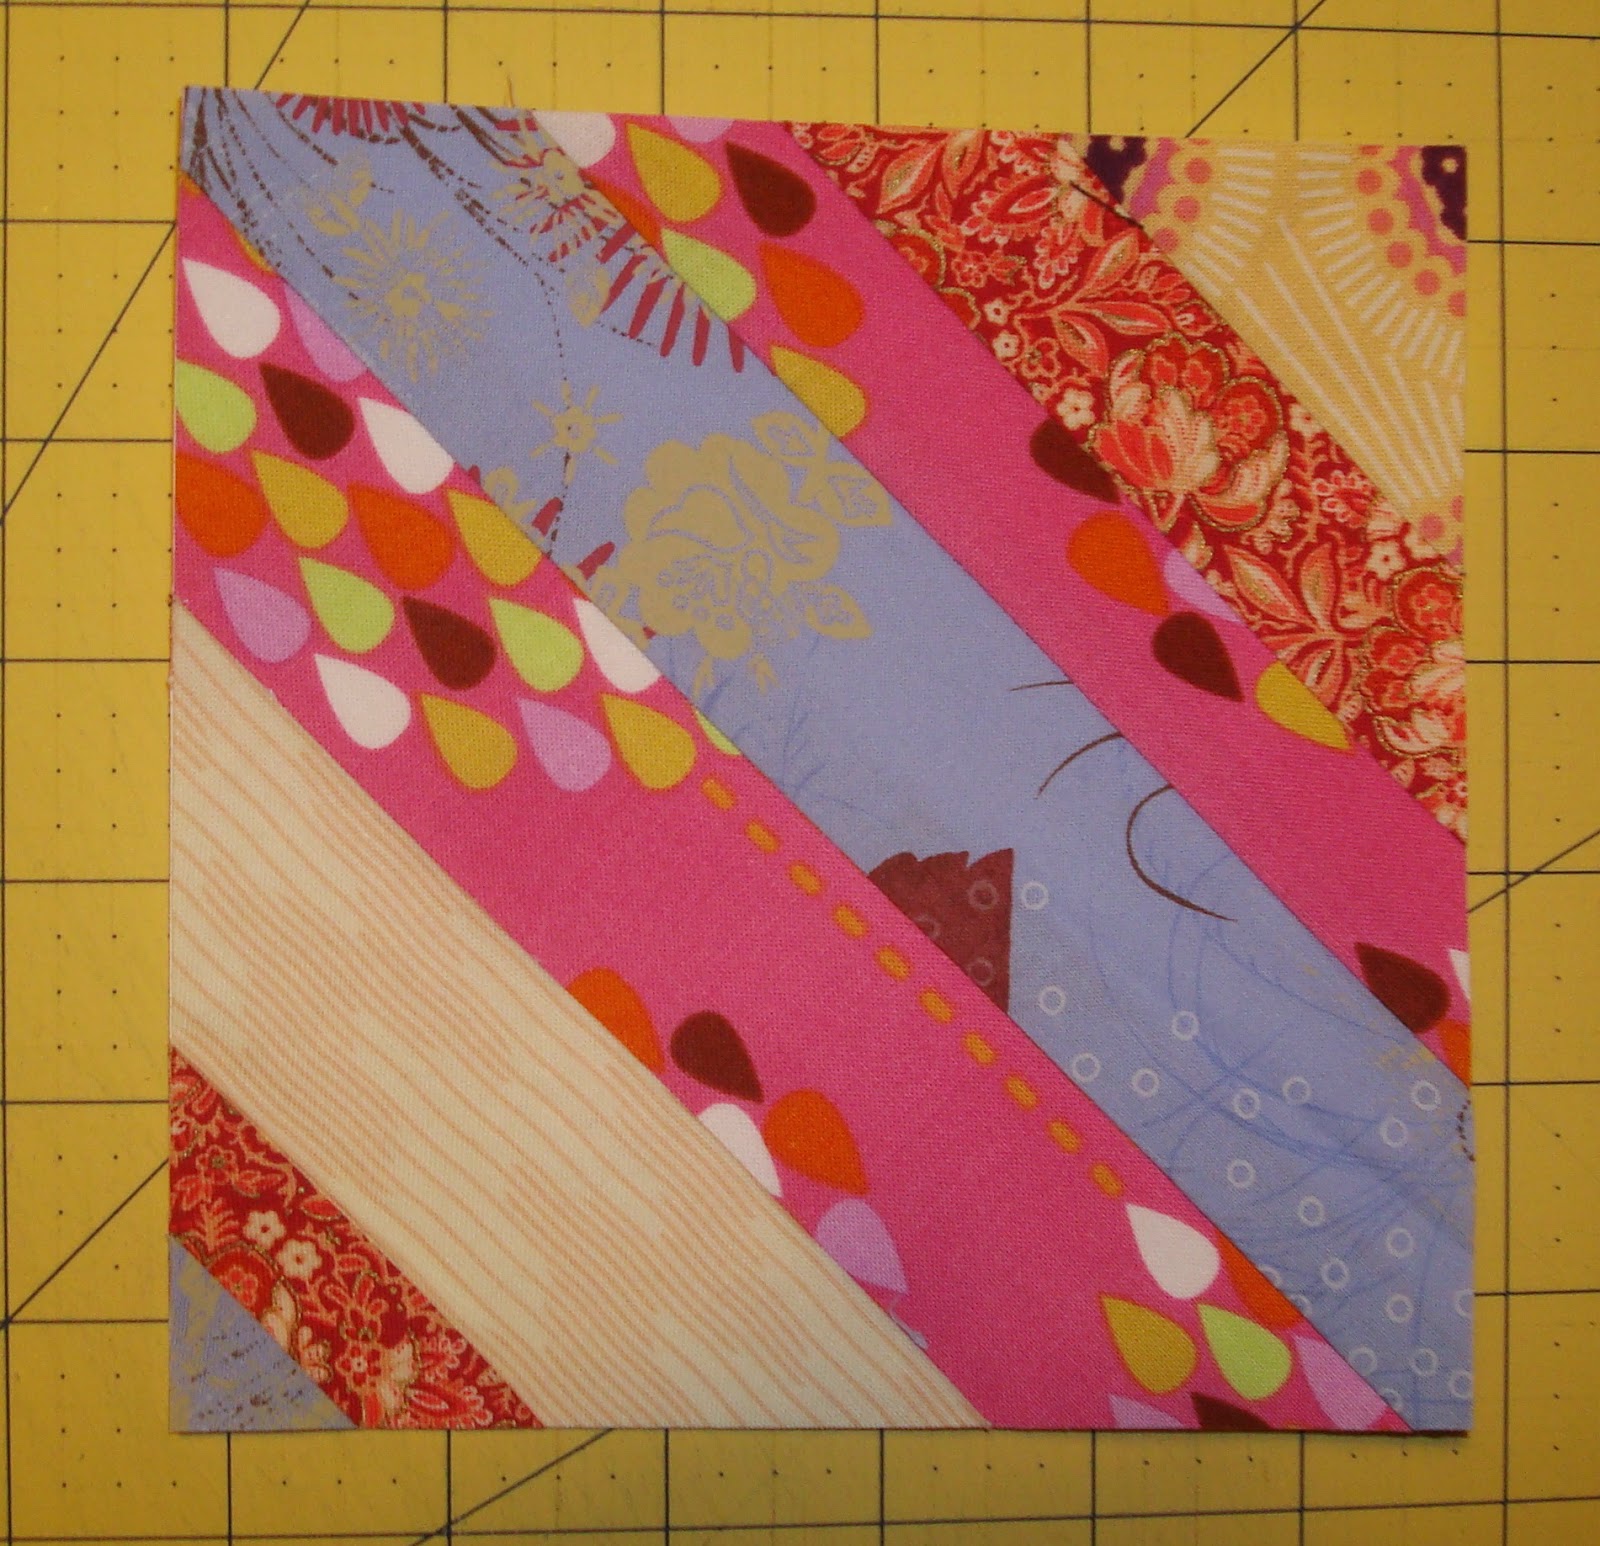
 Continue adding strips and scraps in the same way, sewing through both layers of fabric and the paper foundation, until you've covered your square.


Turn over and trim along the perimeter of the square. Your block should now be 6 inches square.


Using the diagonal line on the pattern, cut diagonally from corner to corner, perpendicularly to the direction that your fabric strips run. Remove paper foundation from your blocks.


For each X block you will need to make TWO scrappy squares.

Using your short 2" by 7" strips sew together pairs of string triangles as shown below. The right angle corners of the triangles should be sewn to the "inmost" end of the rectangle -- one on each side.


Using a 2" by 15" strip, sew together the units you assembled in the previous step. It is encouraged that you pin in the center so that your 2" by 7" strips line up with one another!!


Trim your block to 9.5 inches.


Ta da! You're finished with one block!

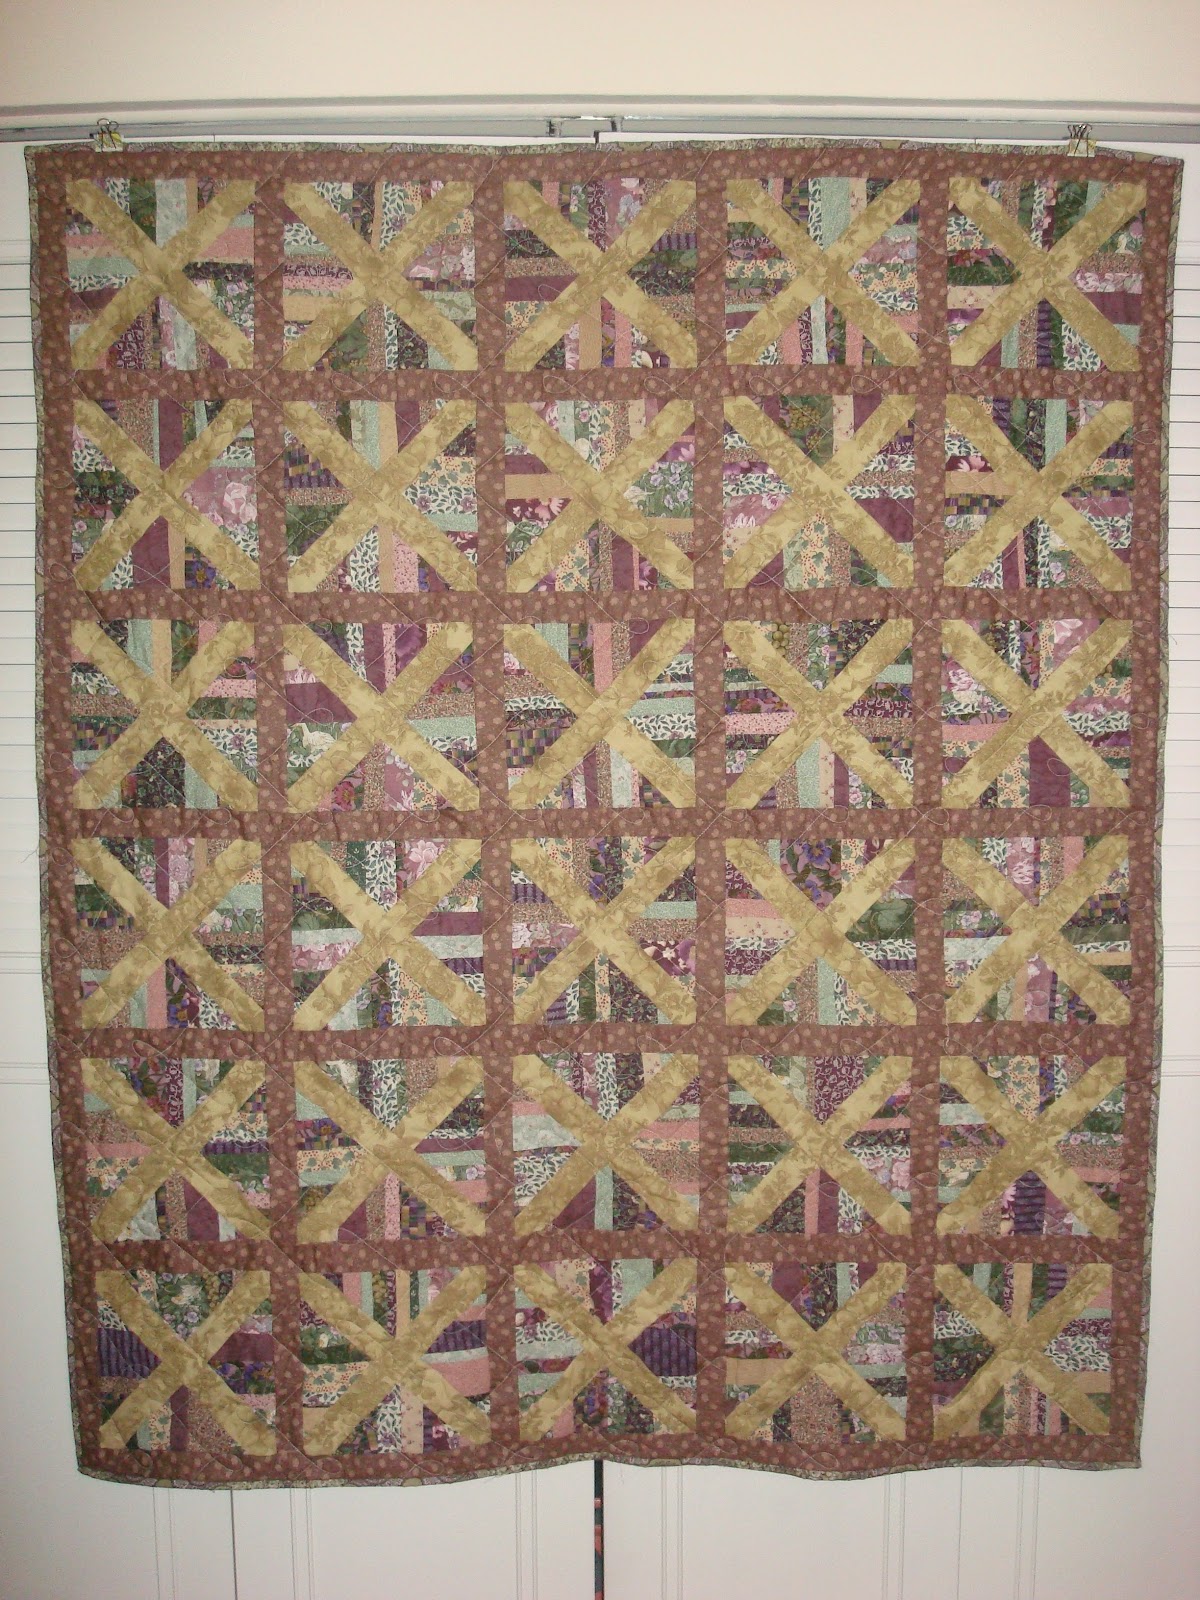
Here's my finished quilt top from way back when if you've never seen it!


The pattern we've written is for a throw with 30 of these blocks just like my original quilt, but this pattern is easily adaptable to both smaller and larger quilts, as well as a quilt without sashing!

Tuesday, April 8, 2014

Stealing and Copyright

Update: As of 5 PM today, the site seems to be taken down or at least interrupted for the time being! Thanks to all who have made some noise and stood up for themselves!

As a few other bloggers have shared, a website called QuiltPatternsPro has been publishing the blog posts of many, many quilting bloggers without our permission and without linking back to the original blog posts. It's flat out plagiarism and illegal.

This site is hosted by GoDaddy.com and as a part of their terms, if one of their sites is violating the copyright of someone else (ie. us!!) we can contact GoDaddy.com and put in a complaint. I already wrote an email to GoDaddy.com  Copyright Claims and wanted to share it with everyone so that you have a simple way to see what a copyright claim with GoDaddy requires.

If you want to use the same letter, GO AHEAD. If you want to tweak it, SUPER. It's important that we don't put up with infringement -- no matter how big or small your blog is.

To Whom It Best Concerns:

The website QuiltPatternsPro.com which is serviced by GoDaddy.com is currently violating the copyright of myself as well as many, many other quilting bloggers by illegally copying our content without permission and without referencing the original sources.

Electronic Signature: (LEGAL NAME HERE) 4/8/14

The content that has been copied illegally has all come from my blog site: littlebunnyquilts.blogspot.com
The content that has been copied illegally can be found here: http://www.quiltpatternspro.com/?s=little+bunny+quilts

The owner of the blog http://www.quiltpatternspro.com should be contacted in regards to this matter. You should know how to contact them as GoDaddy.com is the hosting service for that website.

I absolutely DID NOT give QuiltPatternsPro.com permission to post my blog content in any way.

I affirm that the above statement is accurate to the best of my knowledge.

Please let me know if you have further questions regarding this issue, I'm going to imagine that you are going to get a barrage of complaints against this site today.

Best,(LEGAL NAME HERE)
(blog website)
(email)
(phone number)

April Stash Bee Blocks

This month in Hive #3 of the Stash Bee, our Queen Bee is Afton of Quilting Mod! She designed a fun star block for us to make this month she calls "Focal Star" and requested coral, orchid, turquoise, and chartreuse as the colors with white or off-white low volume prints as the background.

I made three blocks this month, one is an angel block for another hive member who is moving. One block I made with a cream and peach squiggle print, one with off white scrappy low volume prints, and one with scrappy white on white prints for the backgrounds. I used up lots of scrap this month!


Linking up with Fabric Tuesday and Linky Tuesday.

Monday, April 7, 2014

QCQAL Block #3 -- Rolling Stone

This round we'll be making Rolling Stone blocks!


There are tons of fun variations on this block floating all around on blogs and Pinterest so take a few minutes to get inspired by some amazing blocks!

For this block, I've written the pattern so that you'll paper piece the four square-in-a-square units. If you're not a paper piecing fan, there are directions at the bottom of the post on how to piece them in another way.

Cutting:
Paper pieced corner units:
Background scraps -- cutting six 3.25 inch squares diagonally once yields 12 ample triangles
Four squares approximately 3.5 inches square in outer ring color
Scraps in inner ring color -- cutting two 3.25 inch squares diagonally once yields 4 ample triangles

You will also need:
One 4.5 inch square
One strip 2.5 inches wide by at least 18 inches long in inner ring color
One strip 2.5 inches wide by at least 18 inches long in outer ring color


Sewing:
Sew together 2.5 inch strips and press. Subcut into four 4.5 inch sections.


Paper piece your four square in a square units. If your inner ring is a different color than your background fabric (like mine) one of the four corners of each unit should be the inner ring color. Trim units to 4.5 inches along the dotted line. Remove paper from blocks.


Lay out your blocks as shown below and sew together.


If you don't want to paper piece your blocks, cut for the four corner units as follows:
Four 4.5 inch squares in outer ring color
Four 2.5 inch squares in inner ring color
Twelve 2.5 inch squares in background color

Draw diagonal lines across the wrong side of each 2.5 inch square.
Align a 2.5 inch square with the corner of a 4.5 inch square and sew along the drawn diagonal.
Trim seam allowance to 1/4 inch and press. 
Repeat on all corners of your 4.5 squares.

Sunday, April 6, 2014

Triangle Quilt Progress and ALYoF April Goal

Dual purpose post!

My ALYoF goal for April is to get my Triangle quilt top put together, quilted, and bound.

Here's my progress on getting all of those things done as a part of the Triangle Quilt Along.

I decided to go with my eight colors in diagonal stripes across the quilt instead of random placement. I didn't think I had enough different colors to have random placement without making myself completely insane, so I just went the easy route with a pattern.


I have a few rows sewn together, but still quite a few rows to go.


Happy Sunday to you!